I have two offices in my home that I use for different purposes. While I have mostly shared the files I need between them, sometimes a need arises to actually do something on a different PC while I’m in another room. There are a lot of remote access tools out there, but I wanted to see what made the most sense for self-hosting. After some research I landed on Apache Guacamole. It’s a decently mature product that uses HTML5 to provide authenticated access to remote systems – more than just RDP!
This solution means I never have to open SSH to my network – I can leverage my reverse proxy to gain access to Guacamole and then SSH or RDP to whatever device I needed to use. It sounds like something I definitely need to include.
This was one of the more complicated Docker installations to complete. There are three components: The Guacamole web app, the Guacamole Daemon, and the database. For the web app and daemon I used the official images. I struggled with the database. Guacamole does not initialize the database, but there is a mechanism to get the database. I tried with MariaDB for a while before I settled on using Postgres. There were a few reasons for this choice, but the biggest was simplicity. The Docker Postgres image has the folder /docker-entrypoint-initdb.d that can be mapped to the host. When there is no database present, the Postgres container will load anything in this folder.
First I need to build out my environment. I will create the persistent data folders under /docker/config/
sudo mkdir /docker/config/guacamole
sudo mkdir /docker/config/guacamole/record
sudo mkdir /docker/config/guacamole/postgres
sudo mkdir /docker/config/guacamole/postgres/init
sudo mkdir /docker/config/guacamole/postgres/data
sudo chown -R docker:docker /docker/config/guacamole/
I did not create a folder for guacd, as there is no persistent data created by the daemon. The resulting folder structure looks like this:
guacamole/
├── home                 The Guacamole Home folder
├── postgres
│   ├── data              The location of the Postgres database
│   └── init                The location of the initial database
└── record                For session Recordings
Now I need to get the Guacamole database. I will pull the Guacamole image and run it to extract the file I need.
sudo docker pull guacamole
sudo docker run --rm guacamole/guacamole /opt/guacamole/bin/initdb.sh --postgresql > /docker/config/guacamole/postgres/init/initdb.sql
This runs the initdb.sh script inside the Guacamole container and directs the output of that command to the appropriate location on my host. Now I can build my compose file. I will start with the Postgres database.
services:
 guacdb:
  container_name: guacdb
  image: postgres:latest
  restart: unless-stopped
  environment:
   PGDATA: /var/lib/postgresql/data/guacamole
   POSTGRES_DB: guac
   POSTGRES_PASSWORD: '${POSTGRES_PASSWORD}'
   POSTGRES_USER: '${POSTGRES_USER}'
  healthcheck:
   test: ["CMD-SHELL", "pg_isready", "-d", "guac"]
   interval: 30s
   timeout: 60s
   retries: 5
   start_period: 10s
  volumes:
  - /docker/config/guacamole/postgres/data:/var/lib/postgresql/data
  - /docker/config/guacamole/postgres/init:/docker-entrypoint-initdb.d
This will create the guacdb container using the latest postgres image. I have chosen to use an environment file to store the credentials so they aren’t exposed in my compose file. I had initially selected a more complex database name, but while I was troubleshooting the many issues I encountered I set it to match my username, and Postgres appeared to like this more.
This is the first time I’ve bothered to include a health check in my container. The healthcheck section defines how the container will test to ensure that it is healthy. I have told it to check if the guac database is ready. I this file it will check after 10 seconds and then check every 30 seconds until it receives a response or has retried five times. The timing may not be optimal – I may play around with it in the future at some point – but it is functional. I will use the healthcheck to ensure that Docker does not start the Guacamole container until the database is ready.
I have mapped two volumes – one for the Postgres data and one for the location of the initial database. It is important to map the Postgres data folder to the data folder of the container, and not the postgresql folder.
Next I can add in the guacd container. There is not a lot of complexity to this one – just the container name, image, and restart instructions.
 guacd:
  container_name: guacd
  image: guacamole/guacd:latest
  restart: unless-stopped
Finally the Guacamole web interface can be added.
 guacamole:
  container_name: guacamole
  image: guacamole/guacamole:latest
  restart: unless-stopped
  ports:
  - 9080:8080
  environment:
   GUACD_HOSTNAME: guacd
   GUACAMOLE_HOME: /guac_home
   POSTGRESQL_DATABASE: guac
   POSTGRESQL_HOSTNAME: guacdb
   POSTGRESQL_PASSWORD: '${POSTGRES_PASSWORD}'
   POSTGRESQL_USER: '${POSTGRES_USER}'
   RECORDING_SEARCH_PATH: /record
  volumes:
  - /docker/config/guacamole/record:/record
  - /docker/config/guacamole/home:/guac_home
  - /docker:/docker
  depends_on:
   guacdb:
    condition: service_healthy
   guacd:
    condition: service_started
The default port for Guacamole is 8080 – I am going to map port 9080 on my host to this port in the container. I will pull the database credentials from the environment file. Two of the options in my environment section are obviously related to the volumes I have mapped, so I’m going to talk about those together. The RECORDING_SEARCH_PATH of /record is where the session recordings will be stored, should I choose to record a session. The home folder caused me a bit more confusion, so I will go into it in more detail now.
Guacamole uses its home folder to store configuration information. Inside the official image the home folder is /home/guacamole/.guacamole/ – this can’t be changed. We can’t map this folder to our host either. Instead Guacamole does something interesting. It looks at the environment variable for GUACAMOLE_HOME and appends whatever data it finds in that folder to the configuration in the internal home folder. If i want to modify the Guacamole configuration I would put a file called guacamole.properties in my host folder. Guacamole would append any settings in this file to the configuration in the container. I can also use this folder to add extensions to Guacamole – anything I put in an extensions subfolder will be copied to the guacamole container’s extension library. There are a lot of posts out there where people struggle with this, and almost every accepted answer is wrong. You should not be adding files directly to the various folders of your container – let Guacamole do that for you!
The other interesting piece of this section of my compose file is the dependencies. While I have said that guacd is a dependency, I have specified that guacdb must be healthy. When I run docker compose docker will not start the guacaomle container until the guacdb container passes the health check I defined.
Putting it all together, this is my full compose file:
services:
 guacdb:
  container_name: guacdb
  image: postgres:latest
  restart: unless-stopped
  environment:
   PGDATA: /var/lib/postgresql/data/guacamole
   POSTGRES_DB: guac
   POSTGRES_PASSWORD: '${POSTGRES_PASSWORD}'
   POSTGRES_USER: '${POSTGRES_USER}'
  healthcheck:
   test: ["CMD-SHELL", "pg_isready", "-d", "guac"]
   interval: 30s
   timeout: 60s
   retries: 5
   start_period: 10s
  volumes:
  - /docker/config/guacamole/postgres/data:/var/lib/postgresql/data
  - /docker/config/guacamole/postgres/init:/docker-entrypoint-initdb.d

 guacd:
  container_name: guacd
  image: guacamole/guacd:latest
  restart: unless-stopped


 guacamole:
  container_name: guacamole
  image: guacamole/guacamole:latest
  restart: unless-stopped
  ports:
  - 9080:8080
  environment:
   GUACD_HOSTNAME: guacd
   GUACAMOLE_HOME: /guac_home
   POSTGRESQL_DATABASE: guac
   POSTGRESQL_HOSTNAME: guacdb
   POSTGRESQL_PASSWORD: '${POSTGRES_PASSWORD}'
   POSTGRESQL_USER: '${POSTGRES_USER}'
   RECORDING_SEARCH_PATH: /record
  volumes:
  - /docker/config/guacamole/record:/record
  - /docker/config/guacamole/home:/guac_home
  - /docker:/docker
  depends_on:
   guacdb:
    condition: service_healthy
   guacd:
    condition: service_started
I brought up the stack using docker compose. Postgres initialized the database which took some time. Once the database was initialized the Guacamole container started. Once everything was up, I could browse to my guacamole instance by IP on Port 9080. When accessing Guacamole the it is required to add /guacamole to the URL. I will hide this requirement with my reverse proxy later.

The initial credentials are guacdadmin / guacadmin. Once I am logged in I can see that there are no connections available.
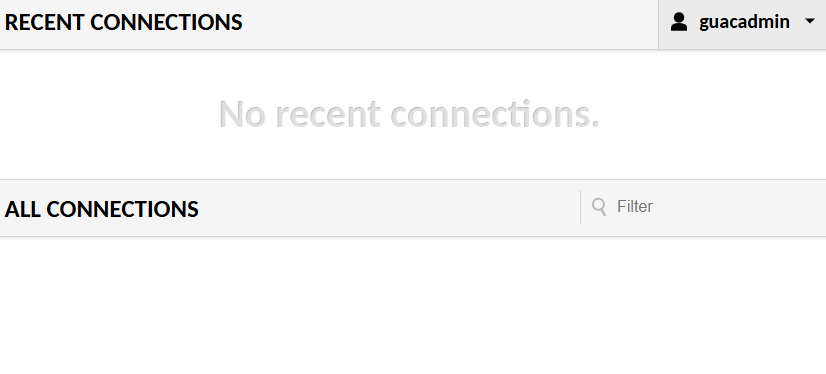
I will navigate to the settings by clicking on my username then clicking on Settings:

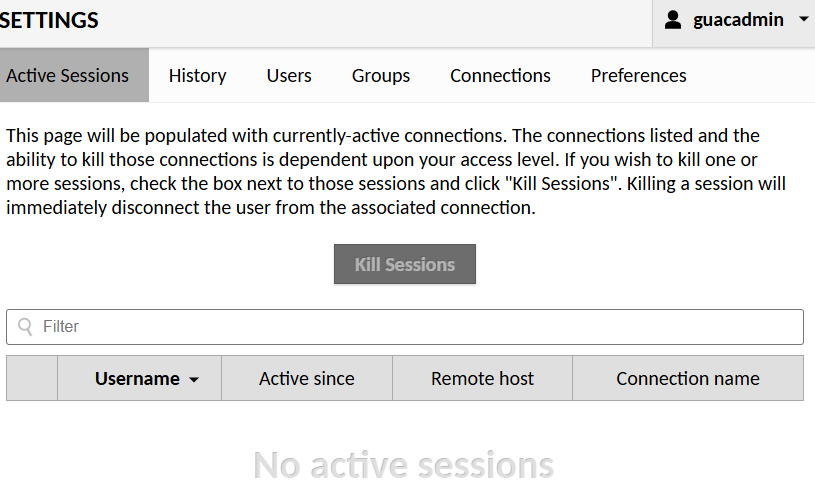
Guacamole’s settings are broken down into six sections: Active Sessions, History, Users, Groups, Connections, and Preferences.
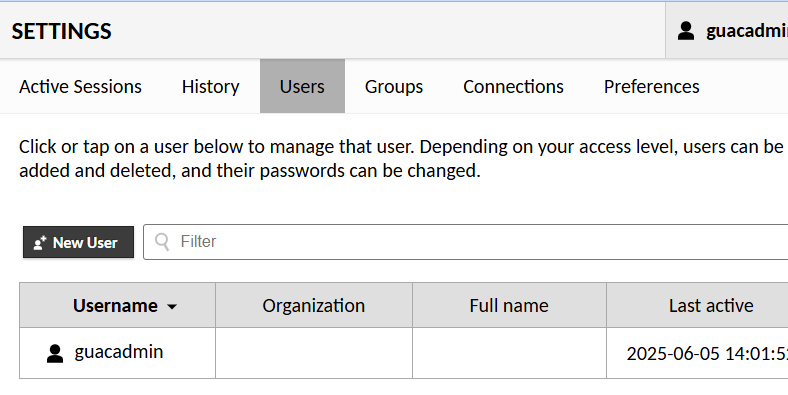
The first order of business is to create a new user so I can delete the built-in account. I selected Users and clicked on New User.
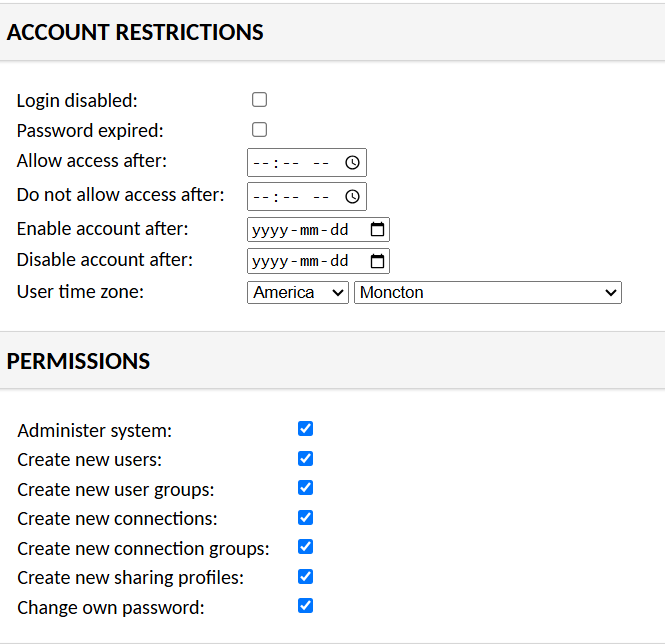
I populated the New User form with the details I wanted to use for my account.

I didn’t put any restrictions on my account. I did set a time zone and I added all the permissions I would require to administer Guacamole.
I logged out of the default account and logged in using my own account. I as able to delete the guacadmin account, but I didn’t take any screenshots.
Now I can add my connections. In the settings I clicked on Connections. There is no structure at the moment, so I will start by building out two connection groups. Connection Groups are different from Groups – more about that later.


After clicking on New Group I was presented with the Edit Connection Group screen.
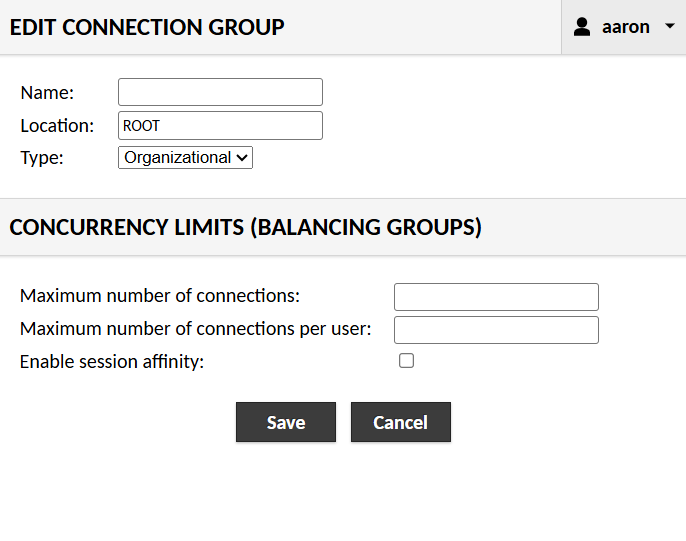
There are two types of groups we can create here – Organizational Groups that provide structure for the various connections, or Balancing Groups. At this time I am only interesting in creating organizational groups. I want to break my connections out by type – SSH or RDP.
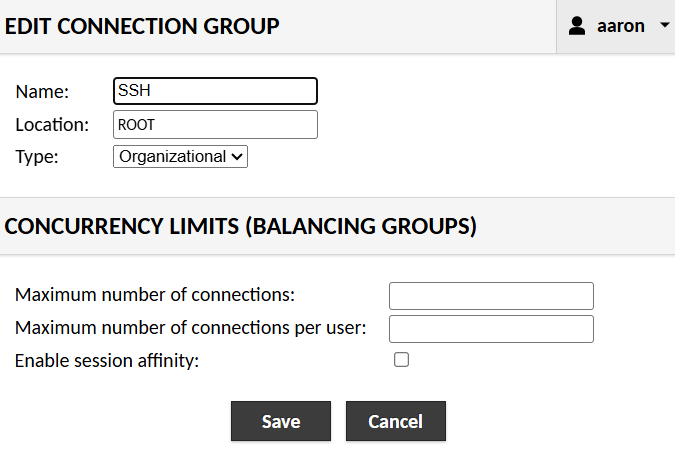
The Name field is what I want to call the folder. The location is ROOT, as this is my first folder. It is possible to nest folders – although I am not doing that now. I don’t need to populate anything in the Concurrency Limits section as I am not creating a balancing group.
After saving, I repeated the process to create a GUI group as well. Now in my Settings I could see my new connection groups.
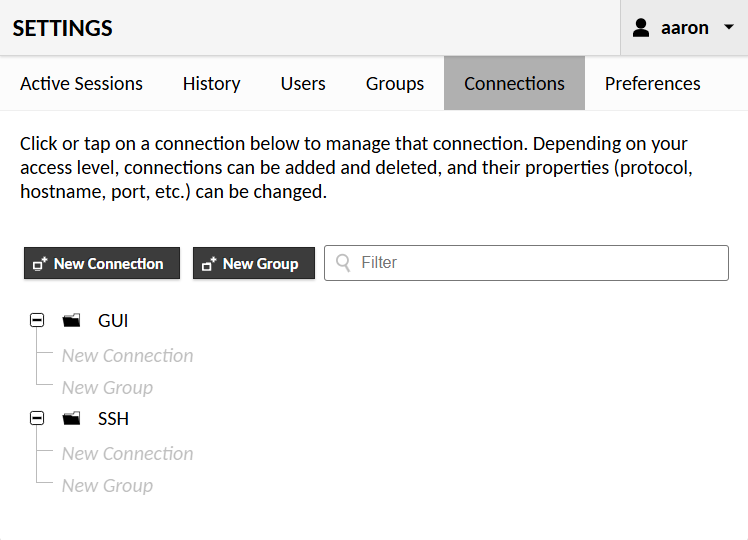
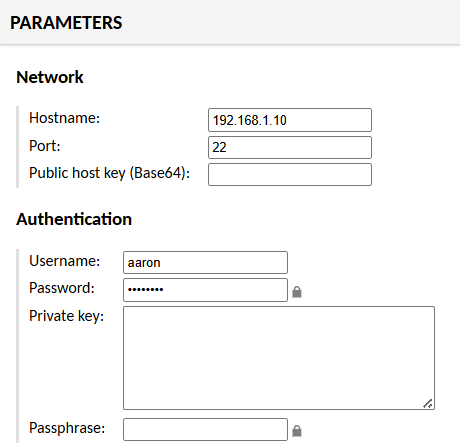
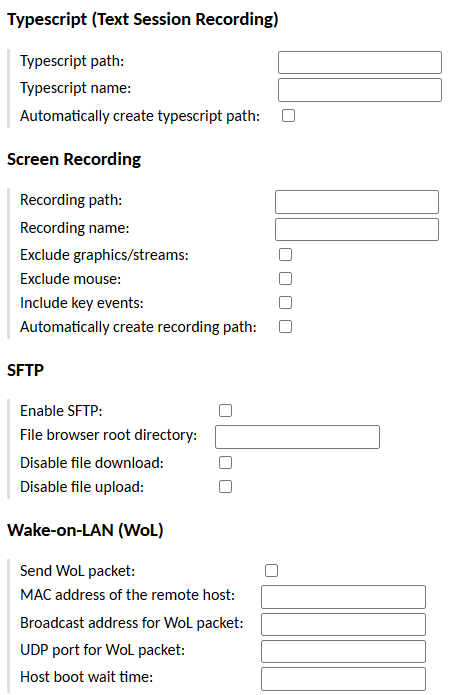
Now I need to add my connections. I started off with SSH because I knew that would be easy. I am using keyboard-interactive authentication for my SSH sessions so I did not need to populate very much data. I set the name and selected the SSH Group folder I had created. I set the protocol to SSH.
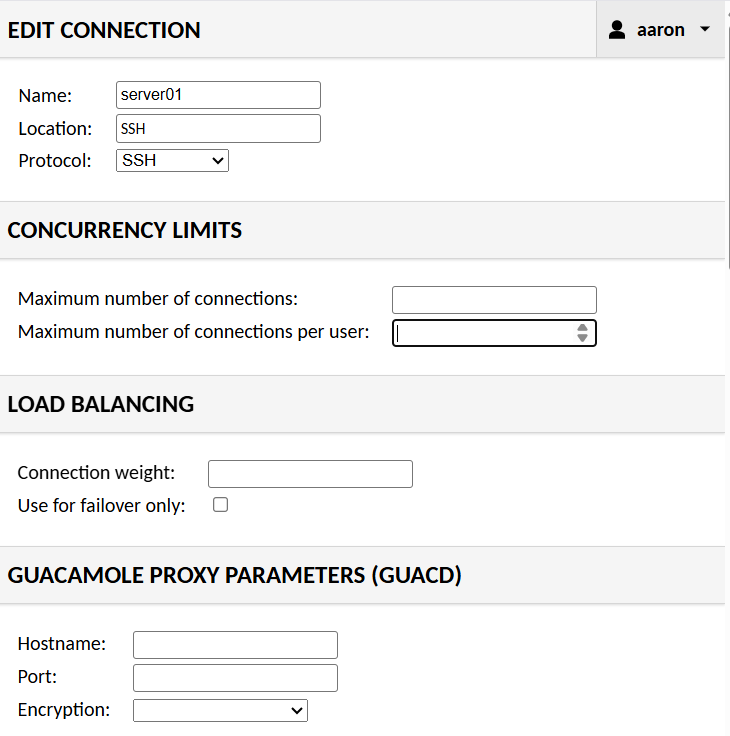
I’m not establishing any concurrency limits for SSH connections as there are no real limitations. I’m not doing any load balancing, either. I don’t need to make any changes to the proxy parameters, either.
I had initially tried to reference the server by FQDN, but that didn’t seem to work. I had to populate the IP address. I entered my SSH credentials in the Authentication section.
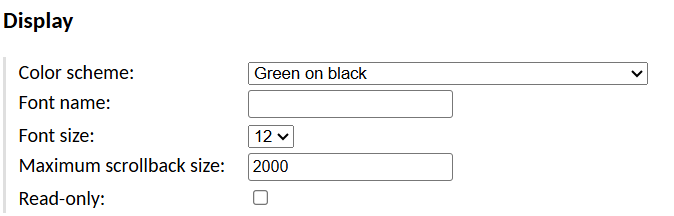
I’ve selected the Green on Black font. When I was first starting out using computers everyone had the orange on black screens, but I always preferred the look of a green on black screen. But that’s just me showing my age!
There are four options out of the box and a Custom option. The Custom option opens a palette allowing colour selection.
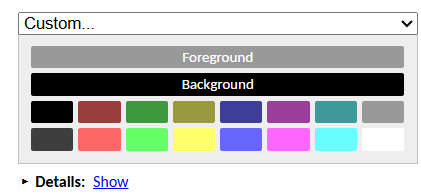
You can customize the palette by showing the details and editing the values in the box that appears.
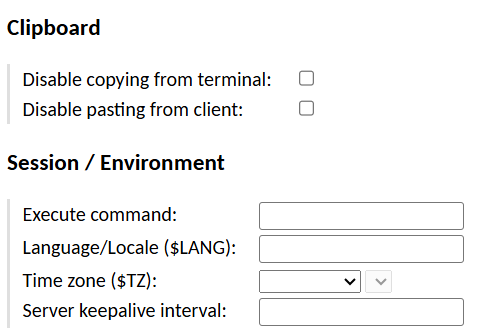
I didn’t make any changes to the clipboard settings or the session and environment settings.
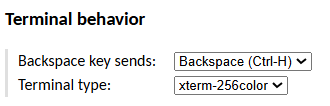
I did configure the terminal behaviour. I want backspace to send backspace, and I selected xterm-256color so I could have colour in my terminals.
I didn’t change any of the remaining settings.
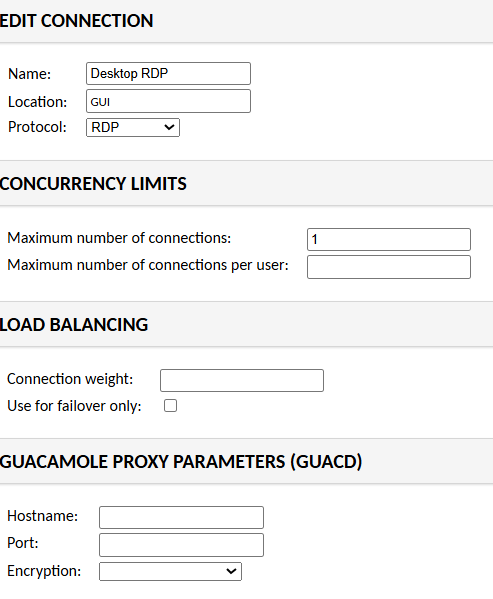
I repeated these steps for server02. Now on to RDP! I’m going to create one RDP connection to the desktop PC in my spare bedroom. This is a Windows 10 PC using local authentication. I populated a name and selected the GUI folder. The RDP protocol was selected. I have limited the number of connections because Windows limits the number of connections – this isn’t a server, so I can only connect once. If I’m connected using RDP the local machine is locked, and if I unlock it locally the RDP session is terminated.
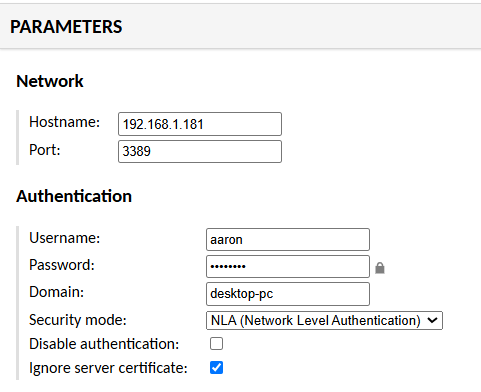
In the Parameters section I entered the IP of my server and the default RDP port. I entered my Windows credentials and put the name of the PC in the Domain section. In order to make the connection work I had to select Network Level Authentication as my Security Mode and ignore the server certificate.
I did not make changes to any of the remaining settings. I did configure my Windows 10 instance to allow RDP connections and added my user to the RDP group.
Now I can see my connections in the Guacamole interface, but I can’t connect to anything. I need to create an access group that gives me permission to connect to these devices.
In my Guacamole settings, I clicked on the Group section. There were no groups present. Not to be confused with the Connection Groups, these groups are used to define which connections each user is permitted to access. I’m going to create a new group called admin that has full access to everything. I can later create new groups that only give access to specific connections or functions.
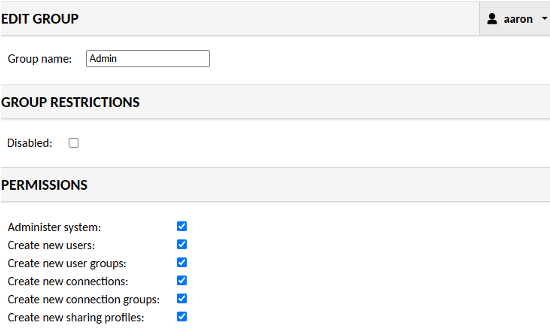
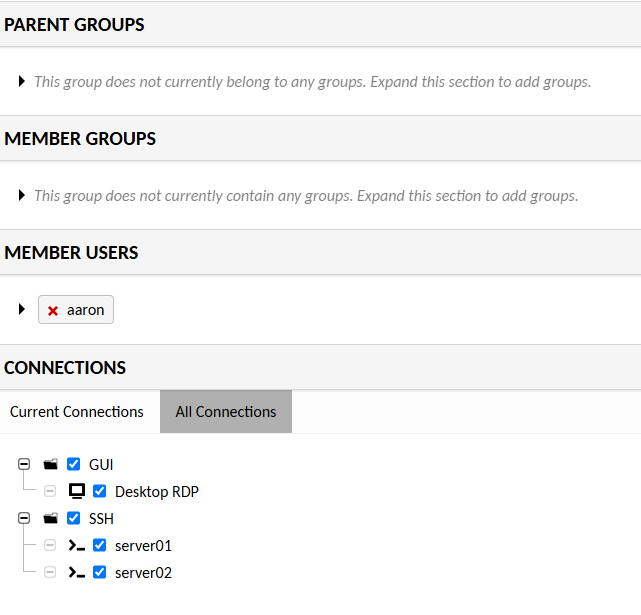
This is my first group, so there are no parent or member groups. I added my user to the group and selected the devices that I am allowed to access – all of them.
I am now able to connect to all three connections using my user account – but I’m not quite done. I still need to configure my reverse proxy. I’ve already set up my DNS server to point to the reverse proxy, and I just need to configure the reverse proxy to talk to Guacamole. I use Nginx Proxy Manager (NPM) because I like the simplicity of a GUI. This connection required some manual settings, though. I built the connection in NPM as I normally would by defining the connection.
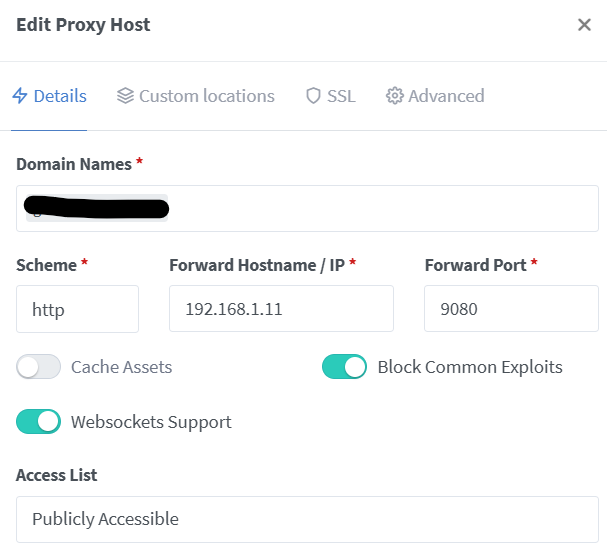
I added my SSL certificate (not shown). I had to customize the Nginx configuration on the Advanced tab.
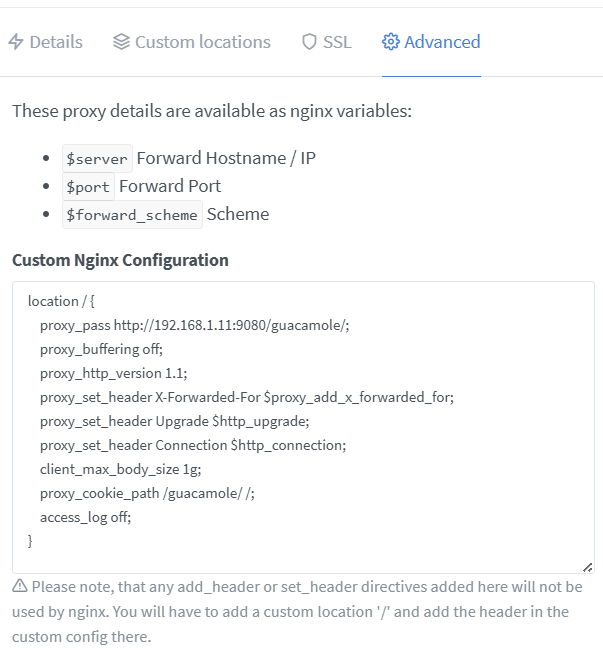
location / {
    proxy_pass http://192.168.1.11:9080/guacamole/;
    proxy_buffering off;
    proxy_http_version 1.1;
    proxy_set_header X-Forwarded-For $proxy_add_x_forwarded_for;
    proxy_set_header Upgrade $http_upgrade;
    proxy_set_header Connection $http_connection;
    client_max_body_size 1g;
    proxy_cookie_path /guacamole/ /;
    access_log off;
}
That’s it! Now I can access my Guacamole instance using FQDN, and it doesn’t require the /guacamole at the end.
Views: 73